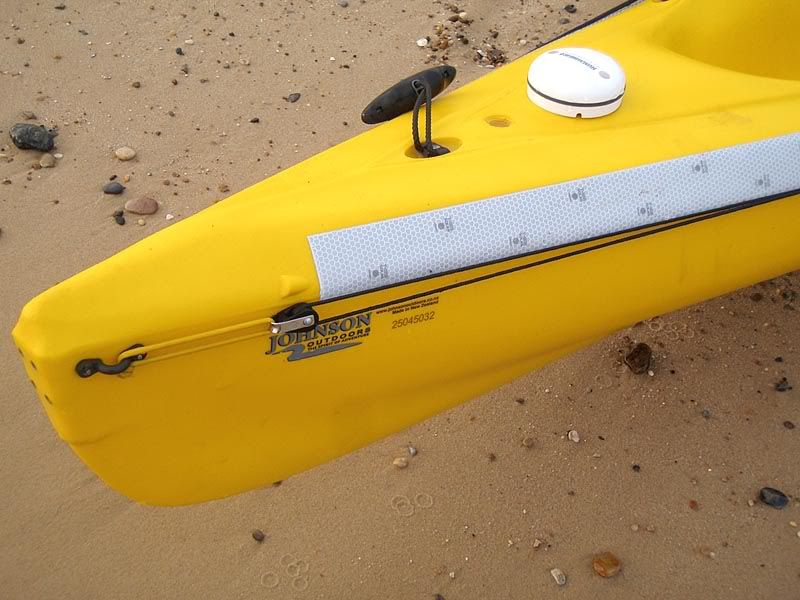
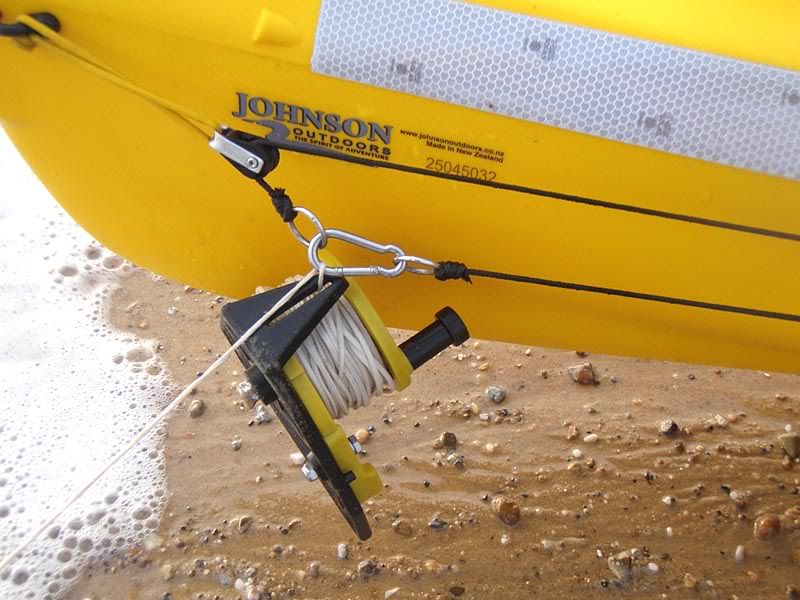
The most important thing is to get the anchor line to run from as close to the bow or stern as possible to keep the kayak as straight as possible in the water. My kayaks make use of strap-eyes riveted to the hull (well sealed to avoid leakage). From here a short piece of shock cord is looped through the free end of a pulley block. The shock cord absorbs the shock from swell and chop and makes for a more comfortable ride when at anchor while putting less strain on the anchor itself. The pulley blocks allow the anchor trolley line to run freely when shuttling fore and aft.
Bow:
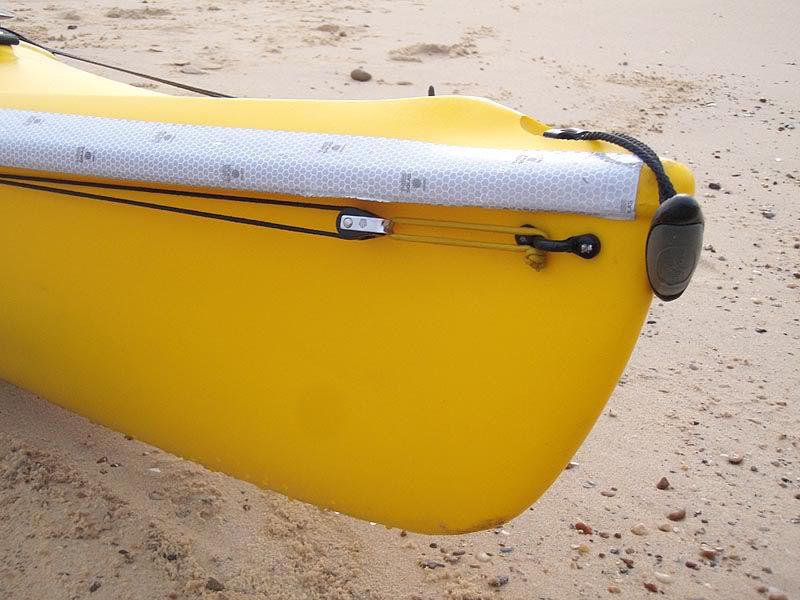
Stern:
One thing to bear in mind is that shock cord stretches – that is its job – but after a while it needs to be replaced with a new, short piece. As you can see these have already stretched substantially and are no longer allowing the kayak to sit as straight as they did originally.
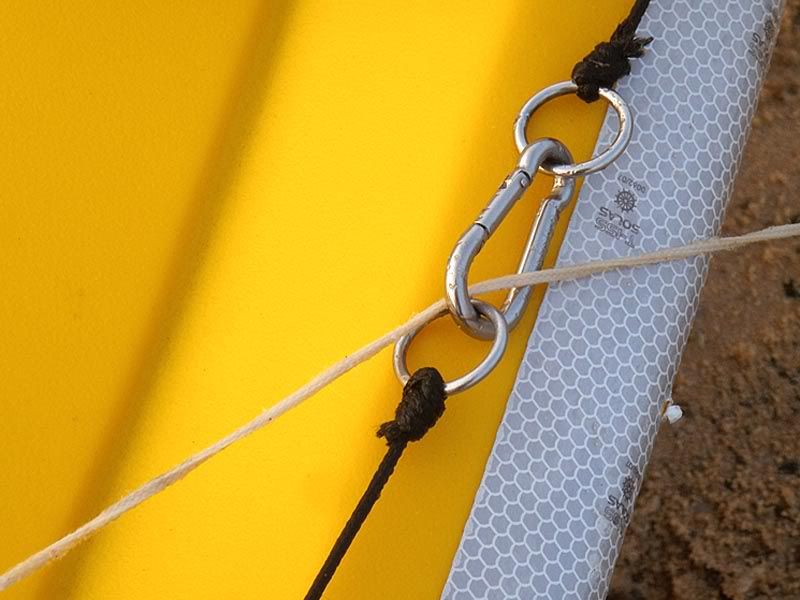
The line used is 3mm Purlon paracord. This is thin cord selected on purpose. Firstly, it needs to be thin to run smoothly through the blocks. Secondly, thinner cord knots better and more neatly than thicker cord. Thirdly there is a weight saving in thinner cord (allow for 15-20 metres of line on a fishing kayak rigged for full length trolley systems on both sides). The main reason, however, is a safety issue – other than fishing lines the most likely line to get tangled in during a capsize is the anchor trolley and so it needs to be of a diameter that can be easily and quickly cut by whichever escape knife is carried. It is desirable to keep the lines pulled tight and under pressure from the shock cord to make it less obtrusive, more streamlined and to keep it out of the way as well as to keep it from slipping from the guides on the blocks. At both ends of the line are attached a 30mm stainless steel ring through which a small stainless karabiner is clipped (a large one adding weight for no advantage). The anchor warp runs through the karabiner:
Having full length trolleys on both sides is useful as they double as grab lines and also allow the option of anchoring (or deploying a drogue) from either side. I personally favour anchoring from the starboard side as I am right-handed and this seems more natural to me, however at times I have to anchor from the other side due to wind and tide combinations and with the kayak rigged in this manner there is the option on to change when required.
An anchor of sufficient weight should be chosen. With an average 2-3 knot current on the area of coastline I fish a 1.5kg grapnel anchor is the minimum required with 2.5kg being the optimum. The anchor is attached to an eye at the bottom by a shackle which is in turn attached to a length of chain that runs along the shank and is attached by a thin cable tie to the eye at the top. The chain continues past the eye before being attached to the anchor warp itself. The cable tie needs to be thin as this is the breakout link – if the anchor becomes stuck fast then a few sharp tugs should be all that is required to snap this and invert the anchor, allowing it to free itself where possible. This reduces the amount of anchors being cut off due to snags. One that is too thick will need undue force to break through and can contribute to a capsize or the abandonment of the anchor. The purpose of the chain is twofold – it increases the weight of the anchor and also pulls the shank downwards in order to assist the prongs embedding into the seabed.
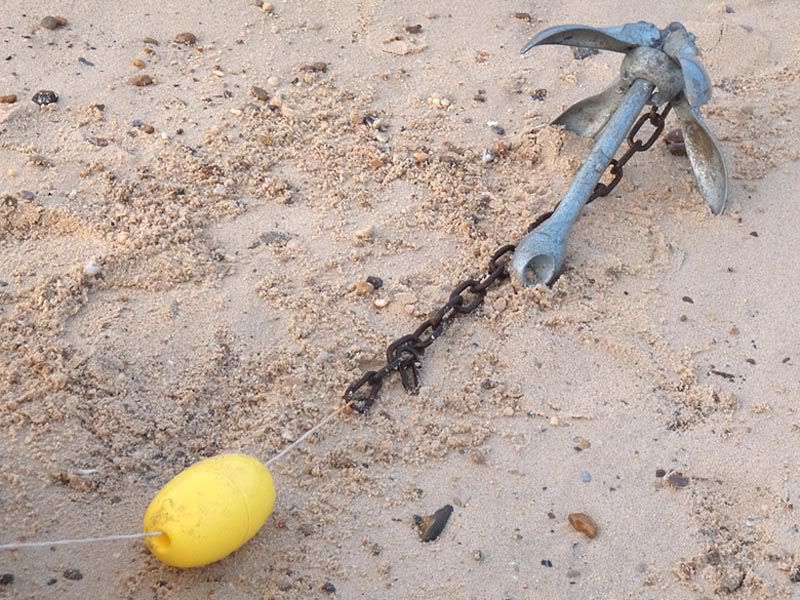
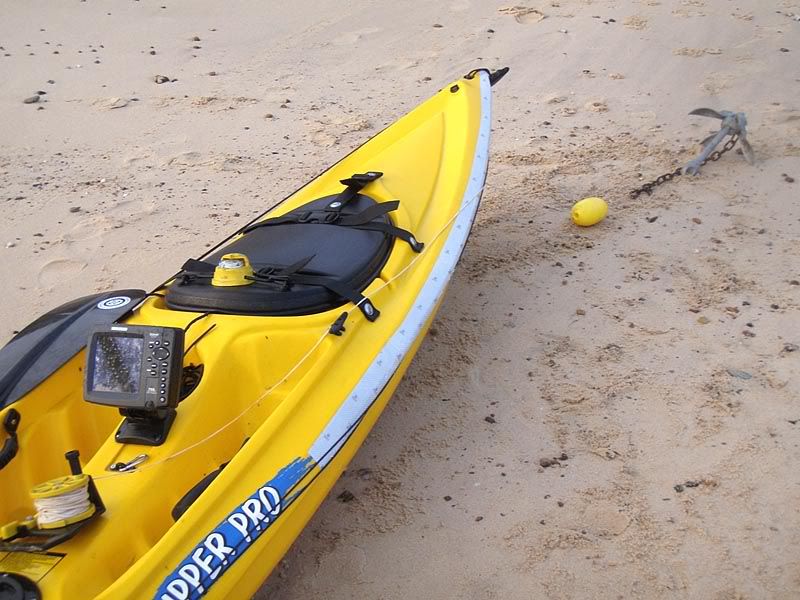
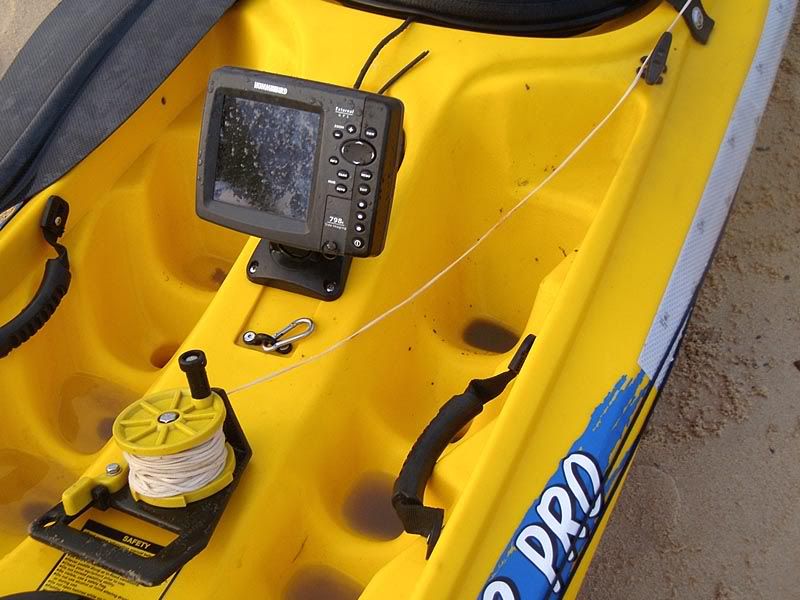
The warp itself runs through an inline buoy, terminating with a dive reel. The buoy has sufficient flotation to allow the reel to float in the event that it is jettisoned for any reason, allowing recovery at a later time. The reel itself is a small diver’s SMB (surface marker buoy) reel containing enough 2mm line to anchor in the depth required. A minimum of three times the depth is required to safely and securely anchor a kayak in tide although more may be necessary in strong tidal flows.
Deployment.
Once ready to anchor the kayak, the anchor is opened up and locked in position with all four prongs extended. It is then dropped over the side with the chain and buoy past the karabiner. The warp is then snapped through the karabiner’s ‘gate’ and the SMB is put into free spool. While the anchor is dropping down the anchor trolley is shuttled to the front (if uptiding) or rear (downtiding) with the reel still being held and this is locked off by use of a cleat. Once the anchor reaches the seabed the objective is to feed sufficient line out as quickly as it is needed to allow the anchor to embed before excess strain is loaded onto it (which can cause it to drag). Once sufficient line is let out the reel is locked off (always leave some line on to assist recovery) and dropped into the water where it is pulled back into position against the karabiner.
The complete system deployed:
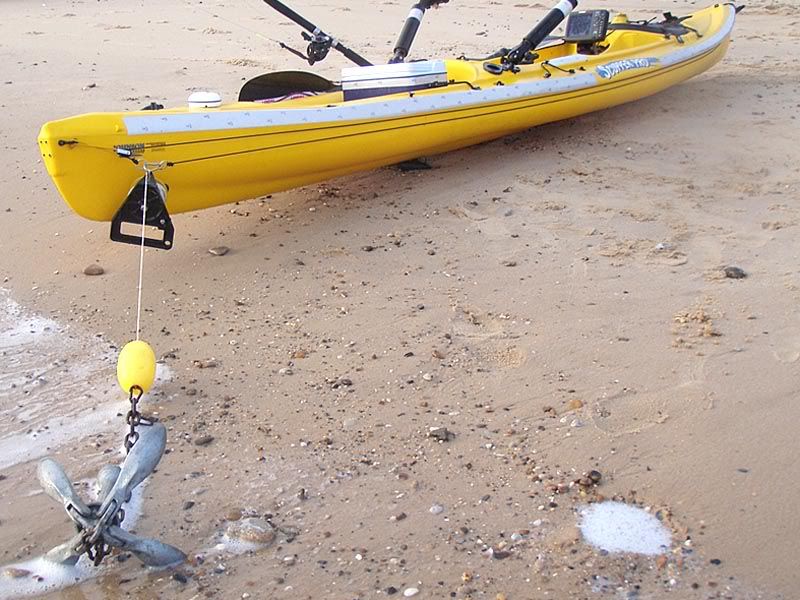
Allow the kayak to take the stretch out of the cord and settle against the anchor before starting to fish.
Retrieval.
Retrieving an anchor safely requires more care than deployment. It is also a more difficult operation especially in a strong flow. To begin with, release the anchor trolley and pull the SMB reel towards the centre of the boat. As it comes into reach, take hold of it and continue to shuttle the karabiner through which the warp runs towards the bow, releasing additional line if need be. Once the karabiner is at the bow, lock the anchor trolley off again.
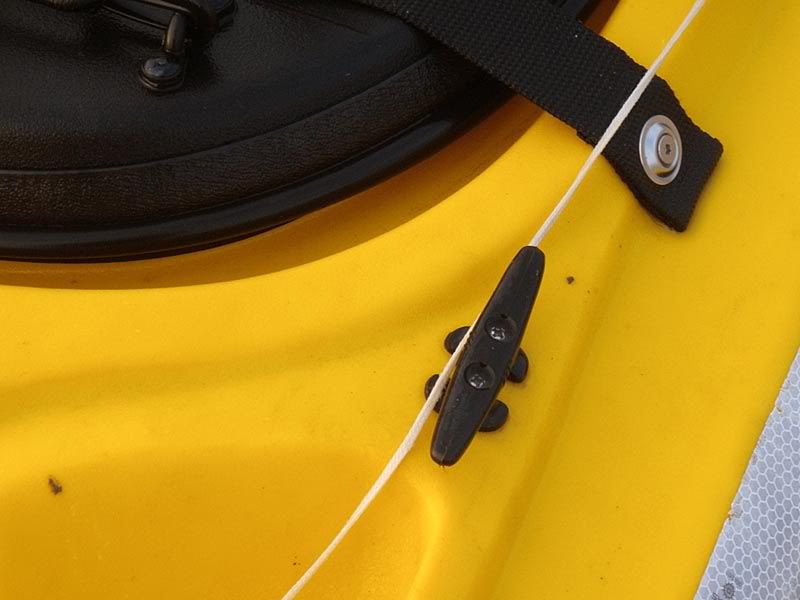
An important addition to the anchoring system is an open cleat fitted forward of the kayakers feet. This works as a guide to run the warp in a straight line from the karabiner to the SMB which is now being used to recover the warp. Again, these are fitted to both sides of the kayak and the line runs inboard of them. In the case that the anchor becomes stuck they can be used for additional leverage to assist in breaking out the weak link. It is useful in this instance to put both feet over either side to increase stability while increasing pressure on the warp and tugging it sharply.
The cleat:
The system from the seat towards the cleat:
Once enough warp has been wound in to free the anchor from the seabed and the kayak is positioned above it, pull the trolley rearwards until the karabiner is alongside, unclip the warp from it and haul it upwards and into the kayak.